Not many can claim 25 years on the Internet! Join us in celebrating this milestone. Learn more about our history, and thank you for being a part of our community!
I would add some rendering next. Very basic, just showing rectangles. Then you can check visually if your collision test works, e.g. with using different colors for colliding or not. Moving the ball directly with mouse would also help to check all cases quickly.
I mean to add the code to visualize the brick(s) and the ball, it does not need textures or shadows or to look good, just a rectangle drawn from lines so you see where they are. It's less about graphics but more about ‘visual debugging’, to verify the code works as expected.
Personally i use those 3 options for debugging / verification / analyzing what my own code is doing:
Visualization, using helper function to draw points / lines / triangles / circles / arrows / boxes etc. This is most helpful for any kind of geometrical problems like intersection tests. I can verify the calculated intersection point, or closest point between two objects etc. is where it should be.
The debugger of Visual Studio. Setting breakpoints, following program execution step by step, looking how variables change , which parts of a branch are taken, which functions are called in what order.
Logging text to screen or a file (like you do using cout to know if colliding or not). This is useful to print warnings if things happen which i assume should never do, or checking improvement after each iteration of some solver, or checking execution times to see if there are some rare spikes so profiling, etc.
I use visualization the most, logging the least. Some people never do visualization for debugging purposes. Either they are geniuses and don't need to, or they just never got the idea they could do it. From all 3 practices it requires most work. First to make and maintain the drawing functions, second to write the visualization code where needed. But for me it is really worth the time. I put the drawing functions in a header file and include it in every project, but for a start it's enough to draw lines with glVertex() to keep it simple.
Oh, forgot a 4th option, which is ‘parameter tuning at runtime’.
In our case you want to move the ball, so you can check collision works from all sides of the brick. I proposed to do that with mouse input.
But often many variables are involved, and we need some GUI to change all of them. And for GUI i use ImGui, which is free and easy to integrate with OpenGL. You can make a comfortable GUI element like a slider with one line of code, anywhere in your code. So that's very useful for debugging too, which also is the initial and main intention of this library. Also solves the problem to print some text on screen which is some work within OpenGL.
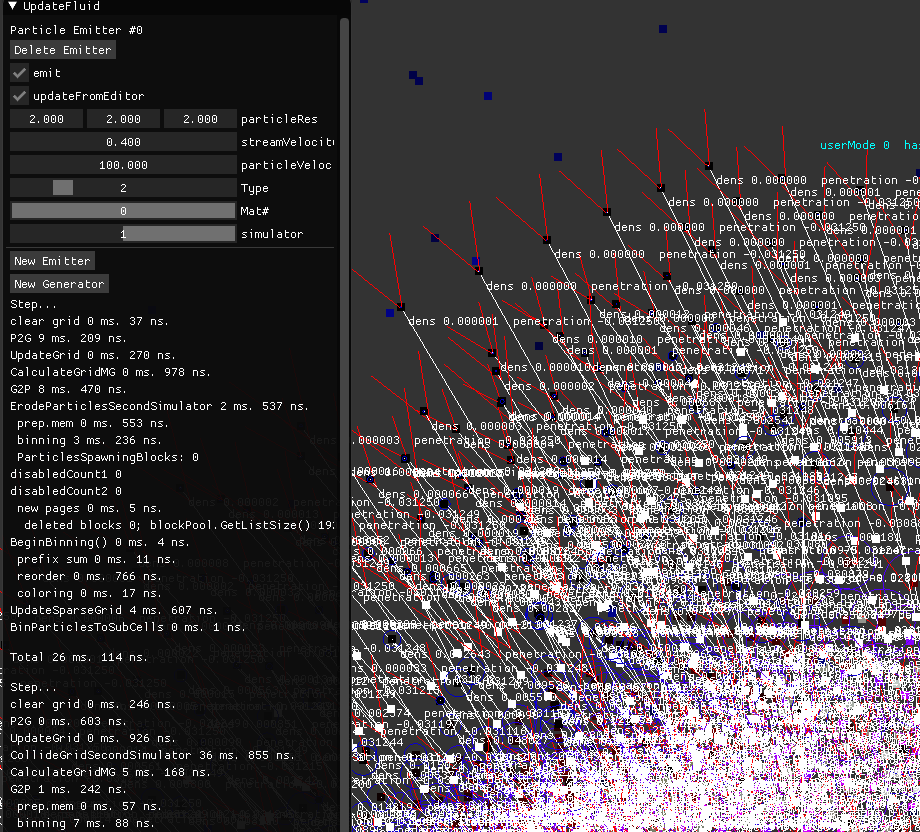
So here is an example of pitting all that together:
Looks like chaos because i'm too lazy to setup a smaller scene with single digit number of particles.
So i was working on fluid simulation, and wanted to have collision from the particles of one simulator with particles of another. And i was unsure the math is right, so i wanted to draw red arrows and print some numbers. (You can only see the tip of the arrows becasue they are shorter than a pixel in the image.)
It ends up messy often, but is very helpful. Once i'm done with the problem i remove it or comment it out for later use.
On the left you see some GUI for editing variables of a particle emitter, and timing outputs for profiling.
Code for the GUI is this:
ImGui::Text("Particle Emitter #%i", i);
					if (ImGui::Button("Delete Emitter")) emitters.erase(emitters.begin()+i);
					ImGui::Checkbox("emit", &emitter.emit);
					ImGui::Checkbox("updateFromEditor", &emitter.updateFromEditor);
					ImGui::DragFloat3("particleRes", emitter.particleRes, 0.01f);
					ImGui::DragFloat("streamVelocity", &emitter.streamVelocity, 1.0f);
					ImGui::DragFloat("particleVelocity", &emitter.particleVelocity, 1.0f);

					int type = (int) emitter.presetParticle.flags.type;
					ImGui::SliderInt("Type", &type, 0, int(MPM_Fluid::Particle::Type::COUNT)-1);
					emitter.presetParticle.flags.type = (MPM_Fluid::Particle::Type)type;

					int maxMaterial = sim[emitter.simulatorIndex].materialManager.GetMaterialsCount (emitter.presetParticle.flags.type)-1;
					int material = min(maxMaterial, (int) emitter.presetParticle.flags.material);
					ImGui::SliderInt("Mat#", &material, 0, maxMaterial);
					emitter.presetParticle.flags.material = material;

					ImGui::SliderInt("simulator", &emitter.simulatorIndex, 0, 1);

					ImGui::Separator();
Which is very little work for the benefit.
So, those are things you should start adding to your bag of tools eventually. The earlier you do, the more time you save. Many questions you ask in the forum you could easily answer yourself with having better debugging tools and using them. It's a very important part of programming in general.
well I have made some more progress, I am able to get the ball to hit a brick and black out the brick but then it redraws the brick, I want the ball to hit the brick and then redraw a black brick but not redraw a blue brick. thank you for all the help and the handholding. I am sorry that I am progressing so slowly. here is my latest code.